Configure ScanSnap Home to Scan to DEVONthink
ScanSnap Home is Fujitsu’s new scan application for its desktop ScanSnap line. Unfortunately our self-configuration that allows DEVONthink Pro Office to insert itself as default destination app for completed scans into the now-legacy ScanSnap Manager no longer works with ScanSnap Home. But with the following steps you can manually configure the new scan application for DEVONthink Pro Office:
Step 1: Open the ScanSnap Home preferences
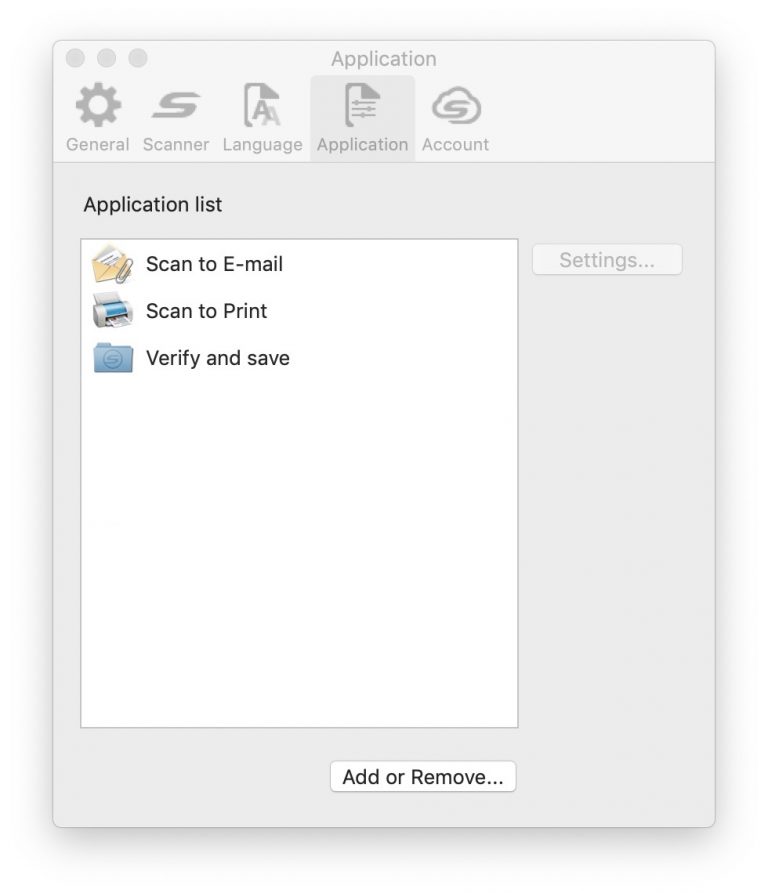
Open the ScanSnap Home preferences (ScanSnap Home > Preferences) and select the Application tab.
Step 2: Add DEVONthink
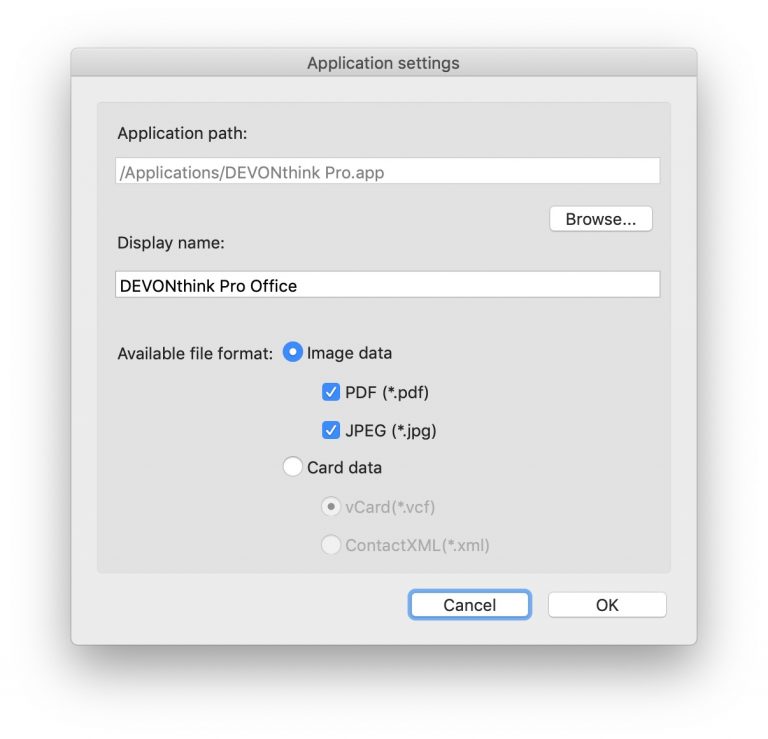
Press the “Add or Remove” button to show the Application available applications list. Press the Add button to add DEVONthink to this list. Use the Browse button to select DEVONthink from the /Applications folder, and enter an appropriate name in the Display Name. Press OK.
Step3: Open scan settings
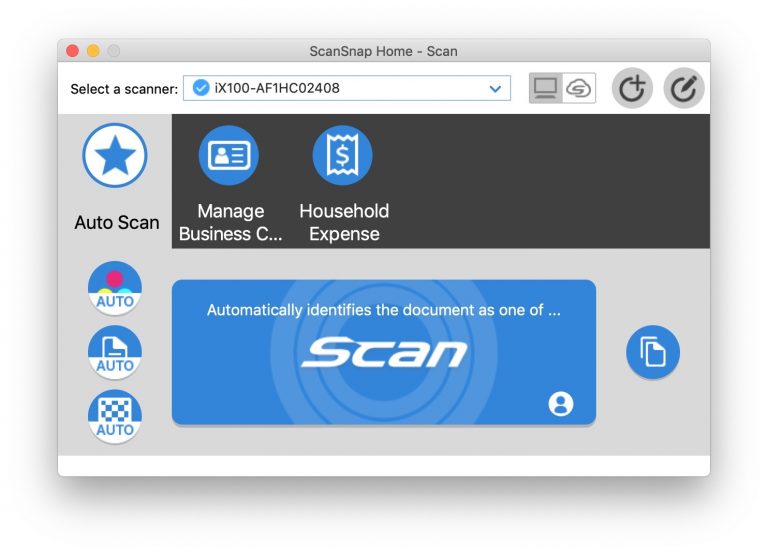
You should now have a DEVONthink entry in the Application list. Close the preferences window and open the Scan Settings (ScanSnap Home > Scan Settings).
Step 4: Add a new profile
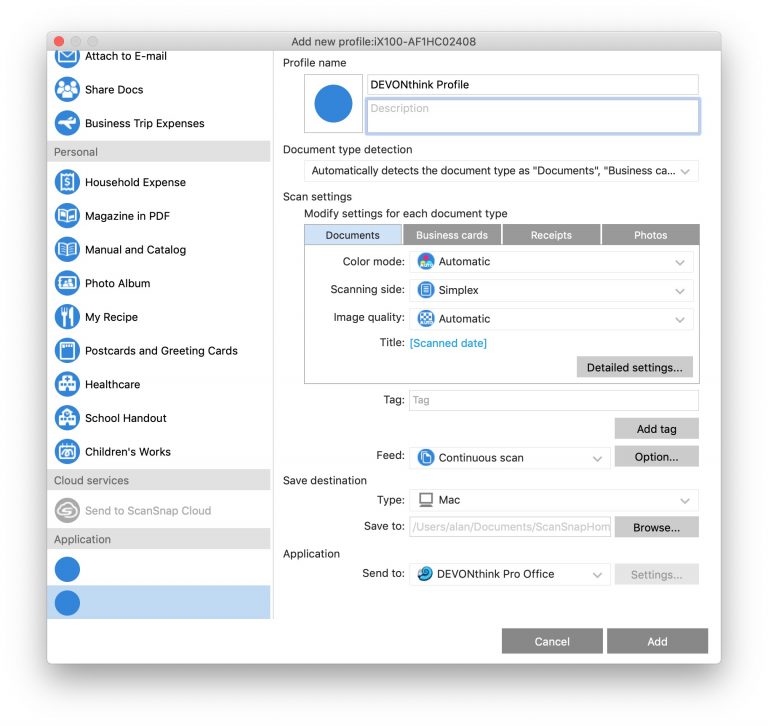
Press the add profile button. In this window there is a list of option on the left hand side, go to the bottom and under the Application group select the DEVONthink application that we added in the Preferences.
Note: In the current version of ScanSnap Home there appears to be a bug where the application name in the list is blank. Select the blank application and it should show DEVONthink in the Send To option. If not select DEVONthink from the drop down list.
Step 5: Select the new profile
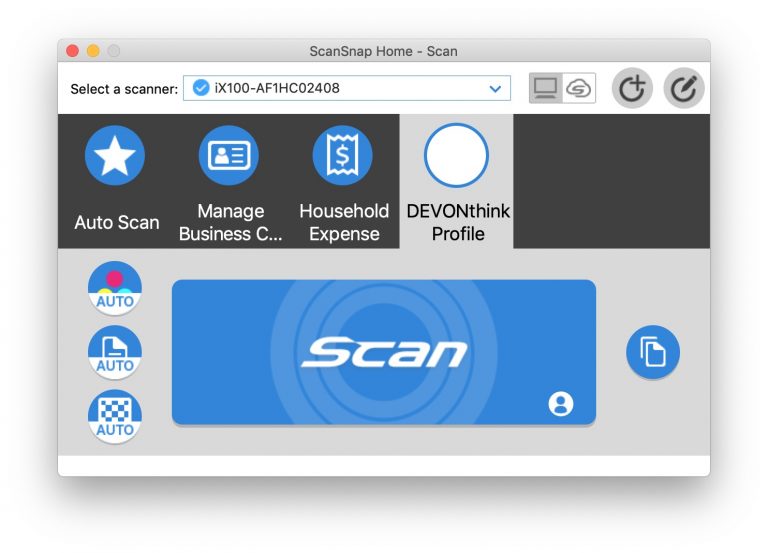
Give the new profile a name and press the Add button. The profile should now have been added to the ScanSnap Settings window as below. Select the DEVONthink Profile and scans should now be sent to DEVONthink.
Note: This article deals with an older app generation. Interface elements, menu paths, and procedures could differ.
